Getting started
I wanted to start this project several years ago. Back then I was considering to use my dual core hp laptop by scrapping the Windows 7 and installing the Ubuntu on it.
Things got procrastinated partly it's human nature and mostly things didn't fit. The laptop's Ethernet was 100BaseT so the throughput could go as much as 100Mbps and harddisks were bottlenecked by USB2.0.
The debut of Raspberry Pi 4 has changed the perspective. Gigabit Ethernet and WiFi, USB3.0, quad-core CPU at twice the clock speed of some NAS products. The form factor is comparable to a pack of cigarette, and together with a Dual Harddisk Docking Station of 32TB capacity, draw me back to the project.


There are also plenty more to explore. By adding OpenVPN, a FTP server, a BitTorrent server, a print server and an Access Point on the same Pi 4, wouldn't you be integrating these technologies flexibly with more success?
It's fun!!
Path to myCLOUD NAS
Follow this tutorial - if you are proficient in Linux, adventurous and/or you have a Raspberry Pi 4 gathering dust.
Buy the myCLOUD NAS DIY Kit - if you want to get a sweet taste of success by doing it yourself. You still need your own Raspberry Pi and a 16GB micro SD memory card. You'll find the accessories you need in the kit, plus a safety net of downloading the working image in case things has gone south.
OR, Look for a public network drive service - best to have fast and free Internet access for connecting to a public network drive, particularly when folders sync is activated after an offline file update. It might take a long time to finish processing the sync job.
What is a NAS?
Network Attached Storage allows you to share files from one, always-on device throughout your house.
With a NAS on your network, you can use it to store your movies and play them from multiple Kodi boxes, store backups on it from your PC, or use it as a BitTorrent box that seeds your files 24/7.
Sure, you could do all this with your main PC, but a NAS is lower-power, and it is designed to be run day and night, even if your desktop is out of commission. Once you start using one, it's hard to go back.
BUILD vs BUY vs CLOUD SERVICE
BUILD - ideally you have a Raspberry Pi and disk drive(s) gathering dust. But even if you start from ground zero, the cost benefit is obvious - although the sense of accomplishment can never be quantified by numbers. You may also run additional applications concurrently on the same Raspberry Pi, five of which are key to a NAS - (1) secured VPN remote access; (2) USER and NAS co-location for faster file transfer; (3) Gigabit Ethernet and WiFi access; (4) USB3.0 interface to Disk Docking Station; and (5) RAID back up.
BUY - a wide variety of choices and price performance to match with the features of the BUILD option. Some NAS need to co-locate with the WiFi router that could possibly undermine the speed when you access a file near a signal blind spot.
CLOUD SERVICE - Beware of irrecoverable loss of storage space if you stop renewing the subscription but forget to backup, particularly the FREE ones. Your FREE storage in public domain is susceptible to removal and security issues - see Google May Delete Your Account or Account Data After June 1, 2021 and the message from Google and that's why we BUILD our own NAS.
Preparing the OS image on the micro SD card
Download the Raspberry Pi OS with desktop on the official Raspberry Pi site.
Look for the version:
Release date: March 4th 2021
Kernel version: 5.10
Size: 1,175MB
Follow the steps in Raspberry Pi Imager. It is the quick and easy way to install an operating system to a microSD card ready to use with your Raspberry Pi.
Before you power up
Check that the Harddisk Docking Station is plugged in the Raspberry Pi.
Check that your cables are connected correctly.
Check that the micro SD card is properly inserted.
Connect the mini HDMI cable from the motherboard to the TV/monitor.
Power up if everything looks OK.
Power up and get your Raspberry Pi online
If you have skipped the WiFi setup during the system configuration during the initial boot up, you can do it now by moving the mouse to the top right hand desktop screen. Click on the wireless icon then choose the WiFi network name and enter the its secured password.
Open the LXTerminal and update your system
sudo apt update
sudo apt upgrade
That should be enough for the Raspberry Pi preparation.
Verify the presence of the external harddisk drive
sudo fdisk -l
you would expect to see /dev/sda1 at the bottom of the command response.
To install SAMBA
sudo apt-get install samba samba-common-bin
To create a place where you store your files
sudo mkdir /home/pi/myCLOUD/shared
Modify the Samba configuration file for sharing folder
sudo nano /etc/samba/smb.conf
In addition, just below the authentication section of the file, paste this following line:
security = user

Within this file, add the following to the bottom. This text defines various details of share.
[myCLOUD]
path = /home/pi/myCLOUD/shared
writeable=Yes
create mask=0777
directory mask=0777
public=no
Now that we are done with the changes made to the file, we will now save it by pressing CTRL + X then Y and hit ENTER.
[myCLOUD]: This defines the address and other configurations related to the shared folders. For example, the shared folder will be abe the following address: \\raspberrypi\myCLOUD.
Make a user for Samba on the Raspberry Pi
sudo smbpasswd -a pi
If you wish to create additional users, key in the following commands:
sudo adduser username
sudo smbpasswd -a username
Lastly, to get the Raspberry Pi local IP address
hostname -I
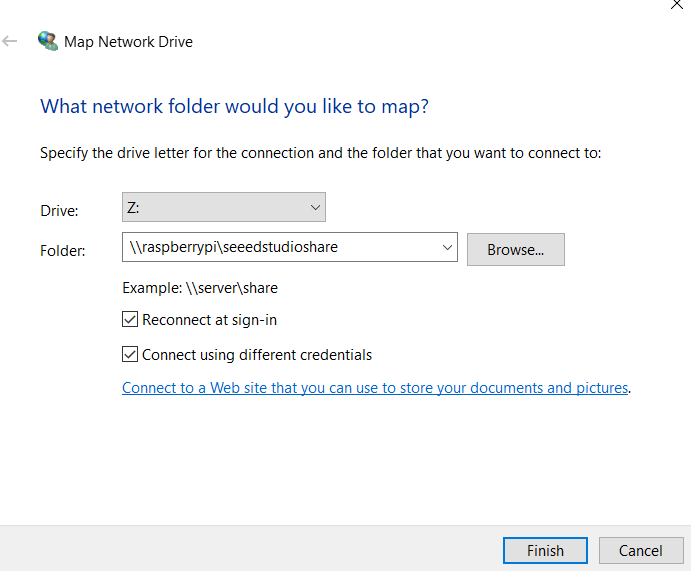
Write down the IP address. Let's say the IP address is 192.168.1.111 for the following MAP Network Drive illustration.
Connecting Samba Server on Windows 10
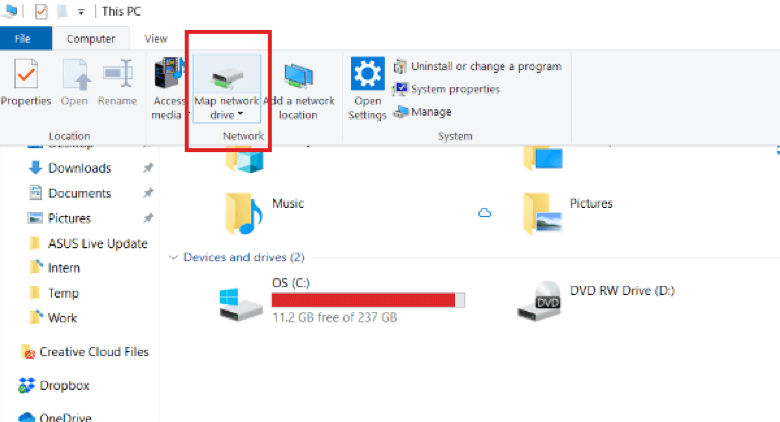
Go to Map Network Drive
- To access files and folders on Windows system, we have to put the address of the shared media. You can do this by going My Computer and click Map Network Drive
- Drive = Z (or any other unoccupied driver letter on the pull down manual)
- folder = \\192.168.1.111\myCLOUD
- Click FINISH, then
- Login as pi and key in the password
Packing List
myCLOUD NAS DIY Kit
↺ GO BACK
- 1 x USB3.0 Dual Harddisk Docking Station (See Note*)
- 1 x Aluminum Case Enclosure = Heat Sink
- 1 x USB WiFi dongle
- 1 x 5dBi Omni Antenna
- 1 x micro htmi to hdmi 6 FT cable
- 1 x 5V 3.5A Power Supply Module
- 1 x myCLOUD NAS installer
- 1 x User guide
Note* : Two drive slots - harddisk not included. You may fit a 3.5in SATA or 2.5in SATA on each slot. Max 16TB each drive. Total max storage capacity 32TB. The Harddisk Docking Station also comes with CLONE feature. Simply insert the master harddisk in the SOURCE slot and the slave harddisk in the TARGET slot, then press the CLONE button to clone.


