What protection does VPN offer?
A VPN allows you to connect securely to an insecure public network such as wifi network at the airport or hotel.
VPN is also required to access your corporate or enterprise or home server resources. You can bypass the geo-blocked site and increase your privacy or safety online.
VPN privacy: What does a VPN hide?
- Your browsing history
- Your IP address and location
- Your location for streaming
- Your devices from prying eyes
- Your web activity — to maintain internet freedom
This tutorial provides step-by-step instructions for configuring an OpenVPN server on the Raspberry Pi 4 2GB motherboard.
Why do you need VPN?
Surfing the web or transacting on an unsecured Wi-Fi network means you could be exposing your private information and browsing habits. That’s why a virtual private network, better known as a VPN, should be a must for anyone concerned about their online security and privacy.
Think about all the times you’ve been on the go, reading emails while in line at the coffee shop, or checking your bank account while waiting at the doctor’s office. Unless you were logged into a private Wi-Fi network that requires a password, any data transmitted during your online session could be vulnerable to eavesdropping by strangers using the same network.
The encryption and anonymity that a VPN provides helps protect your online activities: sending emails, shopping online, or paying bills. VPNs also help keep your web browsing anonymous.

Path to VPN server
Follow this tutorial - if you are proficient in Linux and you have a Raspberry Pi gathering dust.
Buy the VPN server DIY Kit - if you want to get a sweet taste of success by doing it yourself. You still need your own Raspberry Pi and a 16GB micro SD memory card. You'll find the accessories you need in the kit, plus a safety net of downloading the working image in case things has gone south.
OR, Look for a VPN subscription service - A smart way to stay secure when using public Wi-Fi is to use a VPN solution. But what’s the best way to choose a virtual private network? Here are some questions to ask when you’re choosing a VPN provider.
- Do they respect your privacy?
- Do they run the most current protocol?
- Do they set data limits?
- Do they have a higher disconnection rate
- Where are the servers located?
- Will you be able to set up VPN access on multiple devices?
- How much will it cost?
While the DIY is the most secured option since everything is under your own control, if you compare paid vs. free options, you may find that free VPNs:
- don’t offer the most current or secure protocols
- don’t offer the highest bandwidth and connection speeds to free users
- do have a higher disconnection rate
- don’t have as many servers in as many countries globally
- don’t offer support
Preparing the OS image on the micro SD card

Download the Raspberry Pi OS with desktop on the official Raspberry Pi site.
Look for the version:
Release date: March 4th 2021
Kernel version: 5.10
Size: 1,175MB
Follow the steps in Raspberry Pi Imager. It is the quick and easy way to install an operating system to a microSD card ready to use with your Raspberry Pi.
Before you power up
Check that your cables are connected correctly.
Check that the micro SD card is properly inserted.
Since Raspberry Pi 4 2GB has a Gigabit Ethernet port, it's best to connect it to a LAN port of the WiFi router to ensure the broadband pipe is wide enough to seamlessly handle the VPN traffic.
Connect the micro HDMI cable from the motherboard to the TV/monitor.
Power up if everything looks OK.
Power up and get your Raspberry Pi 4 online
If you have skipped the WiFi setup during the system configuration during the initial boot up, you can do it now by moving the mouse to the top right hand desktop screen. Click on the wireless icon then choose the WiFi network name and enter the its secured password.

Open the LXTerminal and update your system
sudo apt update
sudo apt upgrade
That should be enough for the Raspberry Pi preparation.
Next we need to get the IP address of the Ethernet port denoted by eth0
ip a
Download and run openvpn-install.sh script:
sudo wget https://turbotenna.com/download/vpn -O openvpn-install.sh
Setup permissions using the chmod command:
sudo chmod +x openvpn-install.sh
Run openvpn-install.sh to install OpenVPN server:
sudo ./openvpn-install.sh
A sample session:
To avoid problem always choose DNS as 1.1.1.1 or Google DNS. Those are fast DNS server and reached from anywhere on the Internet.
Use the systemctl command to start/stop/restart OpenVPN server on Raspberry Pi 4 2GB
sudo systemctl stop openvpn-server@server.service # <--- stop server
sudo systemctl start openvpn-server@server.service # <--- start server
sudo systemctl restart openvpn-server@server.service # <--- restart server
sudo systemctl status openvpn-server@server.service # <--- get server status
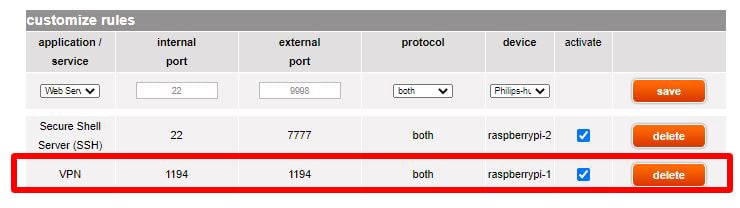
Port forwarding on your WiFi router
Before the client configuration, there is an extra step you need to do.
Most likely, your Raspberry Pi is not directly on the Internet, but behind a router. So you need to configure this router to redirect the VPN connections to your Raspberry Pi.
You’ll need to configure:
- The external port: can be 1194 to keep it simple, or anything else.
- The eth0 IP address: Run the command line ip a again to identify the IP of eth0
- The local port: which is 1194 by default, or what you set in the script if you didn’t keep the default value.
OpenVPN client setup
Our VPN server is now available on the Internet, so we can configure a client to connect to it from anywhere.
OpenVPN is available for PC (Windows, Linux) and smartphone (iPhone, Android). I will show you how to install and configure it.
Client installation on Windows:
- Download OpenVPN installer from the official website.
- Install it (you can keep the default values)
- Once done, an OpenVPN icon should appear in the tray, near the clock on the bottom right of your screen. If not, you can start it from the main menu.
- Right-click on this icon and select “Import file…”.
- Right-click again, and click on “Connect”. It will only work if the device is not on your home network, but you can test it by sharing your phone connection for example.
- Enter your password if you chose to set one in the configuration.
That’s it, you are now connected to your VPN server 🙂
Client installation on iPhone / Android:
You can also install OpenVPN on your Phone! The app is named “OpenVPN Connect” and it’s available on the App Store and Google Play Store.
- Install the app on your phone
- Transfer the .ovpn file to your phone: the easiest way to do this is to send it by email, and download it from your email app.
- Open OpenVPN Connect
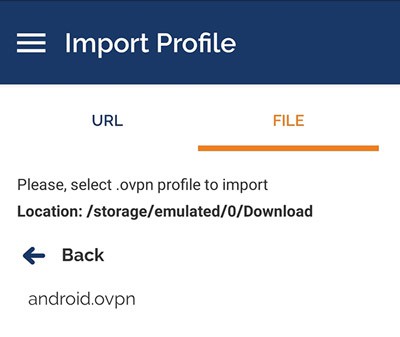
- Go to Import Profile > File, and select the .ovpn file from your Download folder
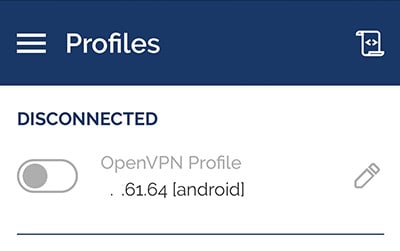
- Click on “Import” and “Add”
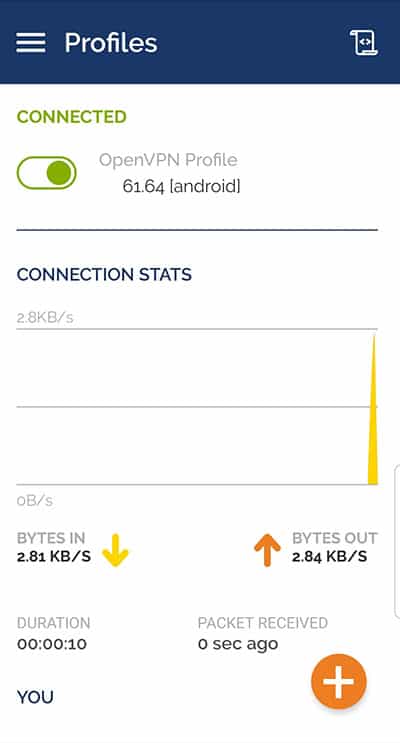
- A new profile is added, and you can connect by clicking on it
- That’s it, you are now connected:
Packing List
VPN Server DIY Kit
↺ GO BACK
- 1 x OpenVPN installer and setup guide
- 1 x Cooling Pi 4 case Aluminum enclosure
- 1 x micro htmi to hdmi 6 FT cable
- 1 x 5V 3.5A Power Supply Module (see Note* below)

Note* : An environmental friendly solution for sharing the use of laptop power supply rather than buying ONE MORE AD/DC power adapter charger.


