Why do I need a WiFi print server?
My printer, a laserjet 1020, still prints well. The compatible toner has become so affordable that there's no reason to get a new one, except my quest for the WiFi print functionality that every device on the network, phone or computer, can print with just a few clicks.
The WiFi print server works great with my laserjet 1020 and so I use it to serve my inkjet printer as well.
On searching a free printer APP for my Android phone, I came across the MOPRIA PRINT APP. Without any business connection with with this company, I simply installed the APP on my phone to test with this WiFi print server. Printing the downloaded document and photo has never been easier and I cursed myself for not doing it sooner.
Not only shall I continue enjoying the low printing cost with the wireless feature, there's no need to buy a new printer with expensive cartridge.
It's fun!!
What is CUPS?
CUPS stands for Common Unix Printing Standard.
Developed by Apple for macOS, it brings support for printers in the Linux world CUPS use IPP (Internet Printing Protocol) to manage local and network printers. It’s the main way, maybe the only one, to install a printer on Linux systems.

Path to turn your wired printer wireless
Follow this tutorial - if you are proficient in Linux and you have a Raspberry Pi gathering dust.
Buy the Wireless Print Server DIY Kit - if you want to get a sweet taste of success by doing it yourself. You still need your own Raspberry Pi and a 16GB micro SD memory card. You'll find the accessories you need in the kit, plus a safety net of downloading the working image in case things has gone south.
OR, Buy the Wireless Print Server Ready-To-Go Kit
Preparing the OS image on the micro SD card


Download the Raspberry Pi OS with desktop on the official Raspberry Pi site.
Look for the version:
Release date: March 4th 2021
Kernel version: 5.10
Size: 1,175MB
Follow the steps in Raspberry Pi Imager. It is the quick and easy way to install an operating system to a microSD card ready to use with your Raspberry Pi.
Before you power up
Check that your cables are connected correctly as shown in the diagram.
Check that the micro SD card is properly inserted.
Since Raspberry Pi Zero W has one USB port, you don't need to connect the printer's USB cable to the motherboard at this stage. Leave the USB port open and make it available for connecting to your USB keyboard.
Connect the mini HDMI cable from the motherboard to the TV/monitor.
Power up if everything looks OK.
Power up and get your Raspberry Pi Zero W online
If you have skipped the WiFi setup during the system configuration during the initial boot up, you can do it now by moving the mouse to the top right hand desktop screen. Click on the wireless icon then choose the WiFi network name and enter the its secured password.
Open the LXTerminal and update your system
sudo apt update
sudo apt upgrade
That should be enough for the Raspberry Pi preparation.
To install CUPS
sudo apt install cups
There are a lot of dependencies, so it can take a few minutes on the Raspberry Pi. At this step, with the Raspbian Desktop version, you should already have access to the CUPS web interface at http://localhost:631
But for a remote access we need to edit the configuration file.
CUPS Installation and Configuration
The main configuration file is available at /etc/cups/cupsd.conf
Follow these steps to adjust the configuration:
- Open the configuration file
sudo nano /etc/cups/cupsd.conf
- Find this line
Listen localhost:631
- Replace by this one
Port 631
This asks CUPS to listen on the port 631 no matter which IP address. But it’s not enough as there are other securities
- We need to allow access from any computer on the network. To do this, find these groups and add the Allow @local directive inside:
<Location />
Order allow,deny
Allow @local
</Location>
# Restrict access to the admin pages...
<Location /admin>
Order allow,deny
Allow @local
</Location>
# Restrict access to configuration files...
<Location /admin/conf>
AuthType Default
Require user @SYSTEM
Order allow,deny
Allow @local
</Location>
- Save and exit (CTRL+O, CTRL+X)
- The last step is to restart the CUPS service to apply changes:
sudo service cups restart
You can now access the web interface from any computer on the network:
http://<IP>:631
If you have a firewall on your Raspberry Pi (iptables or ufw for example), you need to allow access on the port 631

Packing List
Wireless Print Server DIY Kit
↺ GO BACK
- 1 x CUPS installer with user guide
- 1 x Plastic case enclosure
- 1 x micro USB adapter
- 1 x mini htmi to hdmi 6 FT cable
- 1 x short Y-Cable
- 1 x 5V 3.5A Power Supply Module (see Note* below)
Wireless Print Server FULL Kit
↺ GO BACK
- 1 x Raspberry Pi Zero W motherboard
- 1 x 16GB micro SD card with Pre-Installed Raspbian OS + CUPS Wireless Printer APP
- 1 x the set of items listed in the above Wireless Printer DIY Kit
- 1 x User guide
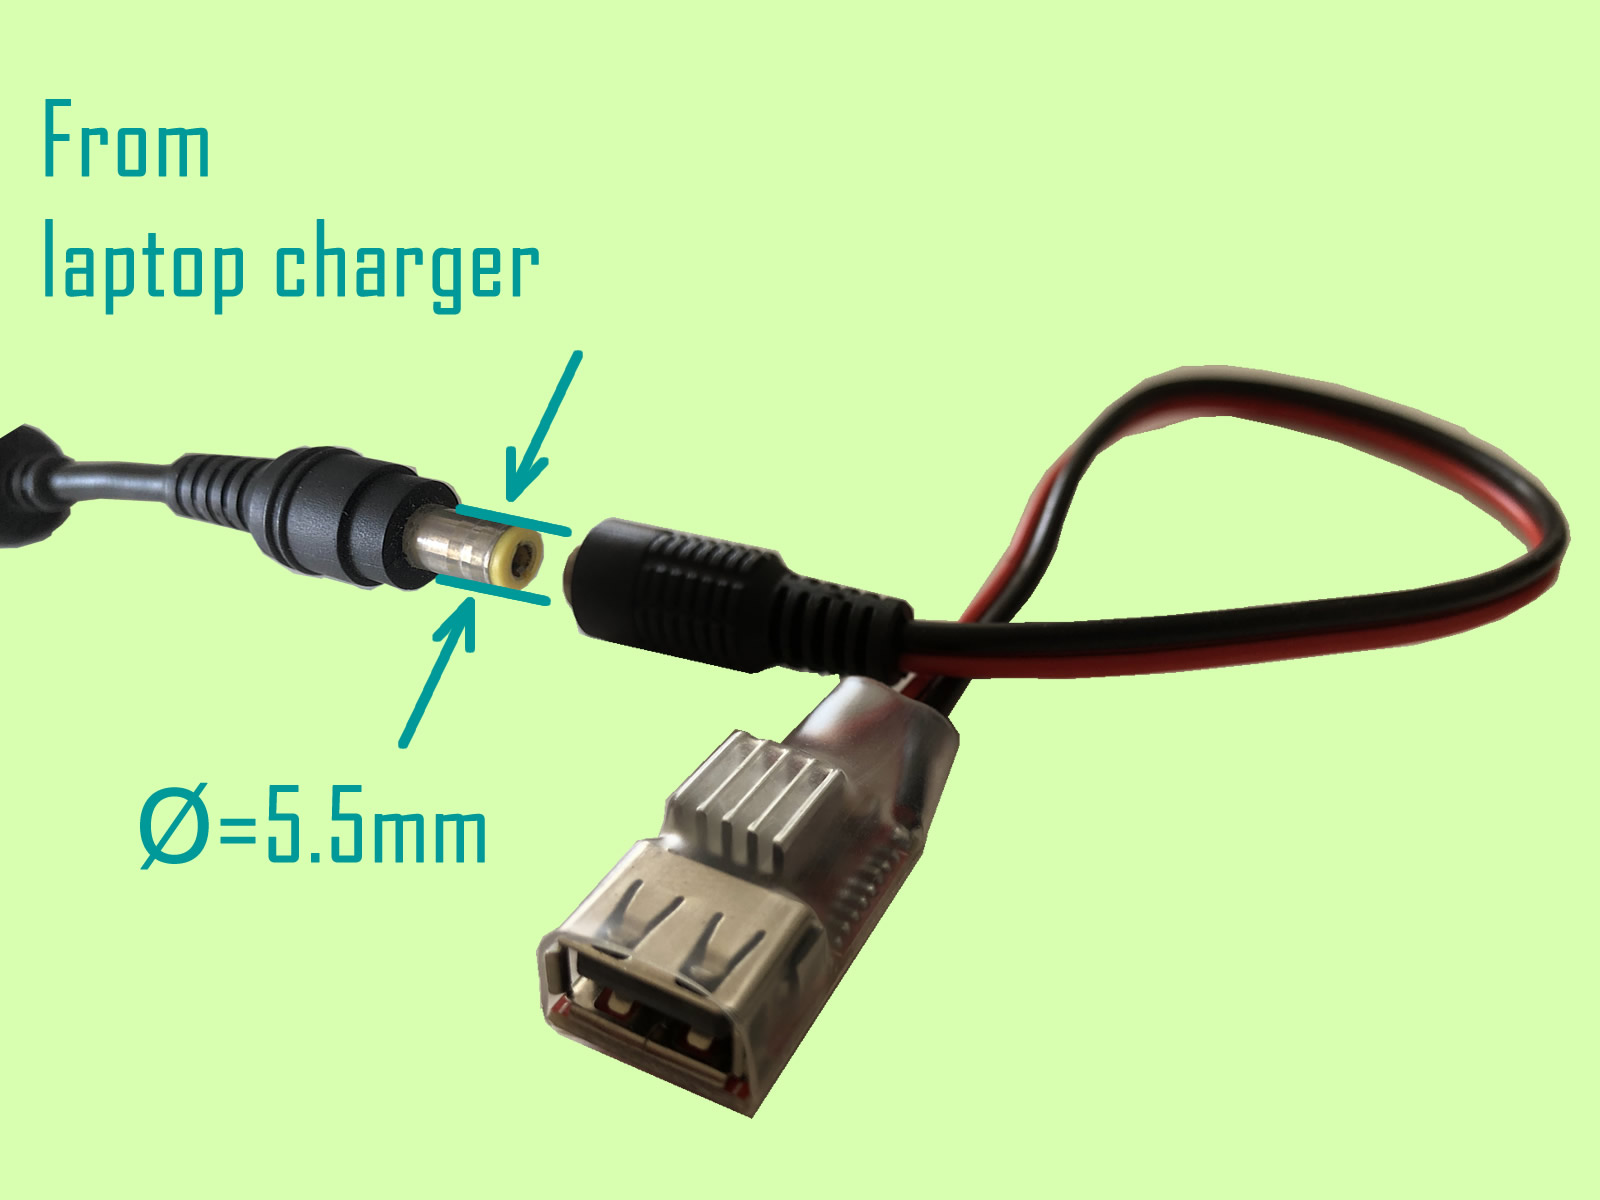
Note* : An environmental friendly solution for sharing the use of laptop power supply rather than buying ONE MORE AD/DC power adapter charger.


